
How to Build a SQL Server Inventory Using PowerShell
You’re a data professional and you’ve been given the keys to a new SQL Server environment. You know you need to build a SQL Server inventory so you know what is in your environment, but how do you get that information?
One of the things I have talked about in other posts is how to create a SQL Server inventory. I’ve discussed using the MAP Toolkit and building your own inventory database using T-SQL. Today, we’ll see another way to generate a list of SQL Servers in your environment.
PowerShell to Find Your SQL Servers
There is a beautiful PowerShell module called DBATools that, somehow, still not everyone knows about. It has hundreds of commands that let you do just about anything you can do in SSMS in terms of showing SQL Server properties. In our case, we want to use the cmdlet Find-DbaInstance.
WARNING: BEFORE YOU RUN THIS CMDLET, NOTIFY YOUR SECURITY PEOPLE THAT A NETWORK SCAN WILL TAKE PLACE, AND ASK PERMISSION TO DO THIS. IF YOUR ENVIRONMENT IS LARGE THE SCAN MAY TAKE A VERY LONG TIME.
As is my custom when working with a new command, I look at the help system in PowerShell.
Help Find-DbaInstance -Detailed
This gives you a full output of the help for the command. One thing I want to draw your attention back to is the length of the scan. you can help limit this by using the -IPADDRESS switch and put in a range to scan like this:
-IPADDRESS “10.1.1.1-10.1.1.5”
OR
an IP Address and subnet mask
-IPADDRESS “10.1.1.1/255.255.255.0″”
One of the simplest ways to get started with this command is to use the -ComputerName parameter.
Find-DbaInstance -ComputerName SQLServerComputerName
By default, this will output a basic set of data:
- ComputerName: Exactly what it sounds like.
- InstanceName: The named instance
- SQLInstance: Complete instance name. For a named instance this will combine ComputerName\InstanceName
- Port: The port SQL Server is communicating on.
- Availability: Whether a connection could be made
- ScanTypes: This command has a lot of ways it tries to discover whether a SQL Server exists, thus the bolded, all caps warning above about talking to security before you run this cmdlet. Here’s a list: Browser, SQLService, SPN, TCPPort, DNSResolve, PING, SQLConnect, ALL. The “default” value in the output for ScanTypes means it will try all of these.
- Confidence: The degree to which results can be trusted. There are 4 levels.
- High: A SQL Connection was established. This includes rejection of the login for bad credentials.
- Medium: A reply from the browser service or both a TCPConnect AND and SPN test.
- Low: Either a TCPConnect OR an SPN test was successful.
- None: There’s a computer on the end of the scan, but no SQL Server instance could be found.
By default, PowerShell doesn’t show you all the possible columns in the output. One way to get that is to pipe to SELECT *, like I’m doing below.
Find-DbaInstance -ComputerName skolarlee-pc | SELECT *
You can also do things like output the data to a file using out-File.
Find-DbaInstance -ComputerName SQLServercomputerName | SELECT * | Out-File 'C:\DBATools\FindInstanceOutput.txt'
Here is sample output. Click to enlarge.
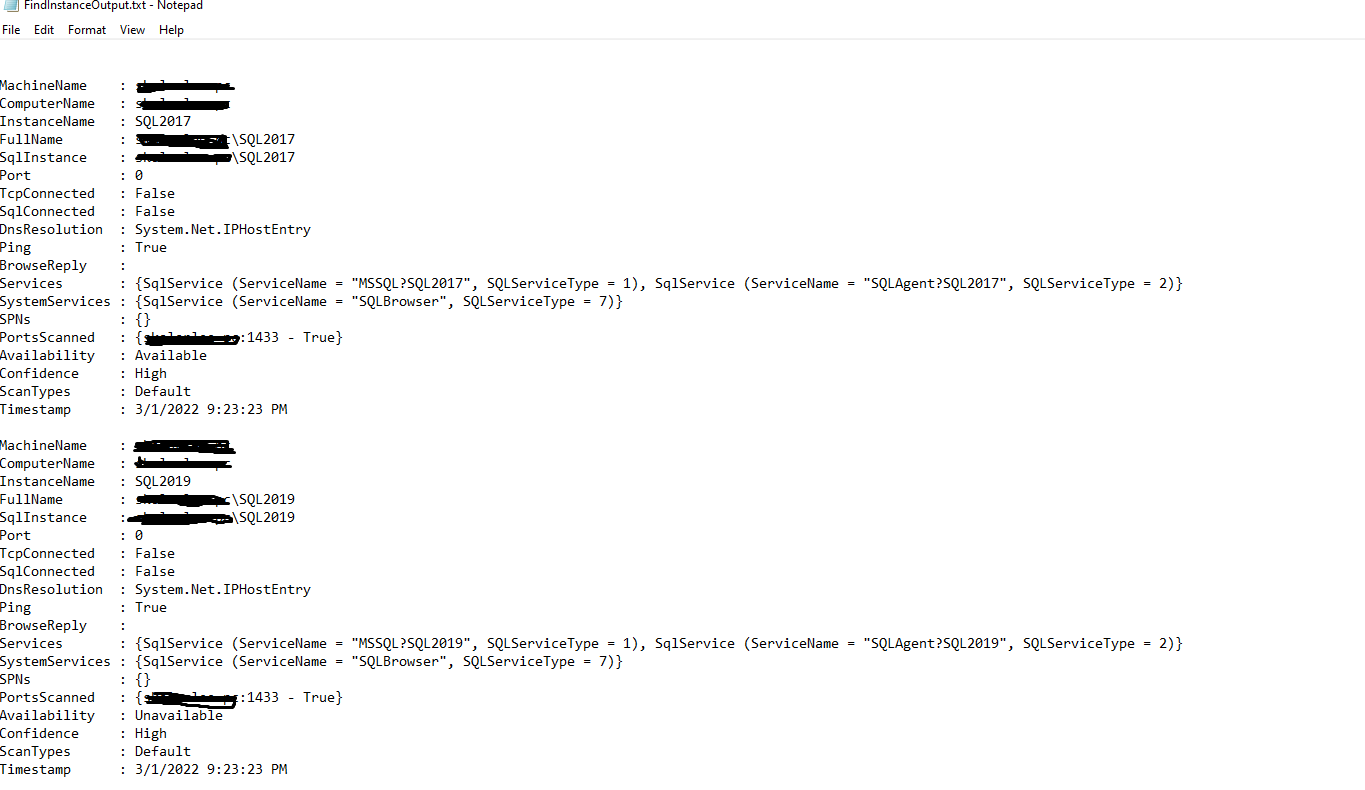
Test file of Find-DbaInstance OutPut
Or, you can send it to a pop up window using Out-GridView
Find-DbaInstance -ComputerName SQLServerComputerName | SELECT * | Out-GridView
here is sample output. Click to enlarge.

Find-DbaInstance Out-GridView
For something more suited to finding SQL Servers across an enterprise environment, you can query Active Directory looking for computers with “sql” in the name and then return their properties.
Get-ADComputer -Filter { name -like 'sql*' } | Find-DbaInstance | Select *
Build a SQL Server Inventory Using PowerShell
Putting all of this together, you could get this data into an Excel format and then insert it into an existing table using Write-SqlTableData. To do this though, you’ll need to import a module called ImportExcel.
This module will allow you to import or export to the Excel .xlsx format. You can pipe that to the standard PowerShell cmdlet Write-SqlTableData. Using the switch -Force will cause the table to be created for you. A bit of a warning though, the data types will be things like NVARCHAR(max) when something smaller will do. So, it might be worth it to make the table yourself ahead of time. You could do this with the cmdlet New-DbaDbTable. Run the help cmdlet against that to see how to leverage that to make your table ahead of time.
Another word of caution, this code connects to Active Directory to get a list of computers with SQL in the name. That part does not cause any issue. However, after it does this, it will likely do repeated scans of computers to detect the existence of a SQL Server.
Talk to your Security team before running this code.
Install-Module ImportExcel
Get-ADComputer -Filter { name -like 'sql*' } | Find-DbaInstance | Select * | Export-Excel 'C:\DBATools\FindInstanceOutput.xlsx'

(Import-Excel -Path 'C:\DBATools\FindInstanceOutput.xlsx') | Write-SqlTableData -ServerInstance "SQLServerInstanceName" -DatabaseName "DBAUtility" -SchemaName "dbo" -TableName "SQLInstances" -Force
Read-SqlTableData -ServerInstance "SQLServerInstanceName" -DatabaseName "DBAUtility" -SchemaName "dbo" -TableName "SQLInstances"
Next Steps To Take
- Experiment with New-DbaDbTable to see how to make tables with it.
- Install the ImportExcel module.
- Talk to your Security team about using these commands to find SQL Servers.
- Try out the code in the last section.
- If you have questions or comments, leave me a comment on this post, or message me on Twitter or DM me on LinkedIn.
[…] Lee Markum wants to figure out where all the servers are: […]