November 8, 2026
In parts 1 and 2, we laid the foundation for a SQLLab. We figured out how to use virt-manager to create a Windows Server 2025 lab copmposed of 4 virtual machines on a Linux Mint host. Here is what I built.
| Machine | IP Address | Purpose |
|---|---|---|
| DC01 | 192.168.50.10 | Active Directory and DNS |
| Utility | 192.168.50.12 | Jumpbox, SSMS, DBATools |
| SQL01 | 192.168.50.21 | SQL Server node 1 |
| SQL02 | 192.168.50.22 | SQL Server node 2 |
All four VMs run on KVM/libvirt, using the SQLLab virtual network and subdomain.example.com we set up.
In this post, we will walk through an automated install of SQL Server and creating the Windows cluster needed to build an Availability Group.
Installing SQL Server with Automation
This routine is a reconstruction of a script I made by hand several years ago for an employer. Some months back I decided it was time to get a version of this in my own GitHub so I could use it anytime I needed to install SQL Server.
Here are some pre-requisites.
- You need DBATools installed.
- The chosen SQL Server installation media is extracted and accessible locally (ISO must be unpacked).
- Ensure all paths referenced in the script exist or will be created prior to execution.
- Review and update script parameters to fit your situation.
- Keep in mind that to use a default account virtual account to run the SQL Server services, click “cancel” when you are prompted for credentials.
$AuthMode     = 'Mixed'
$Feature      = 'Default'   # dbatools: Default installs Engine, Replication, FullText, Tools. Options are : Default,All,Engine,Tools,Replication,FullText,DataQuality,PolyBase,MachineLearning,AnalysisServices,ReportingServices,IntegrationServices
$Version      = 2025 #2017 2016, 2017, 2019, 2022, 2025
$SqlInstance  = 'SQL01'
$InstancePath = 'C:\Program Files\Microsoft SQL Server'
$MediaPath    = 'C:\SQLServerMedia\SQL Server 2017\Developer_ENU' #This is the location of extracted installation media. Extracted media is a requirement.
$DataPath     = 'C:\SQLData'
$LogPath      = 'C:\SQLLog'
$TempPath     = 'C:\SQLTempdb'
$ErrorActionPreference = 'Stop'


if (-not (Test-Path $MediaPath)) { throw "SQL setup media path not found: $MediaPath" }

# Base parameters
$params = @{
  AuthenticationMode            = $AuthMode
  Feature                       = $Feature
  Version                       = $Version
  Path                          = $MediaPath
  SqlInstance                   = $SqlInstance
  InstancePath                  = $InstancePath
  DataPath                      = $DataPath
  LogPath                       = $LogPath
  TempPath                      = $TempPath
  PerformVolumeMaintenanceTasks = $true
}

# Prompt only when needed / desired
$EngineCredential = Get-Credential -Message "SQL Server Engine service account"
$params.EngineCredential = $EngineCredential  # supported by Install-DbaInstance

$AgentCredential = Get-Credential -Message "SQL Server Agent service account"
$params.AgentCredential = $AgentCredential

if ($AuthMode -eq 'Mixed') {
  $SaCredential = Get-Credential -Message "sa password" -UserName "sa"
  $params.SaCredential = $SaCredential        # supported by Install-DbaInstance
}

# Normalize Feature to list for reliable checks
$featureList = if ($Feature -is [string]) { $Feature -split '\s*,\s*' } else { @($Feature) }

if ($featureList -contains 'AnalysisServices') {
  $params.ASCredential = Get-Credential -Message "Analysis Services service account"
}
if ($featureList -contains 'IntegrationServices') {
  $params.ISCredential = Get-Credential -Message "Integration Services service account"
}
if ($featureList -contains 'ReportingServices') {
  $params.RSCredential = Get-Credential -Message "Reporting Services service account"
}


Install-DbaInstance @params
In my case, I copied the ISO for SQL Server 2025 Enterprise Developer Edition to SQL01. From there, I mounted the ISO. Mounting the ISO allows me to see all the associated files. I selected all those files and copied them with CTRL + C.
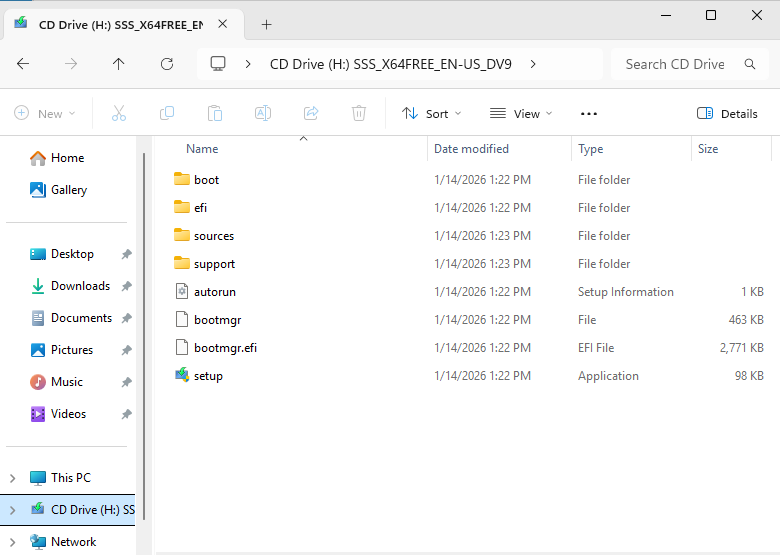
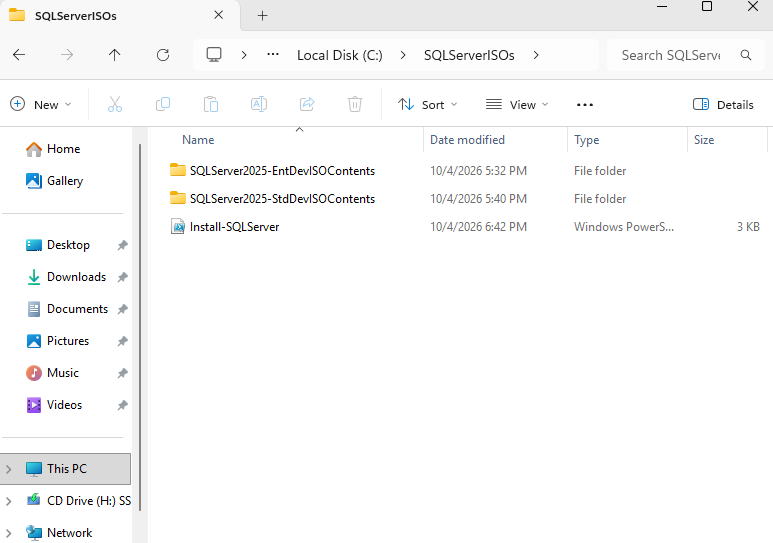
Then, I made a new folder on the SQL01 machine at the root of C called “SQLServerISOs” and in that directory I made “SQLServer2025_ENTDevISOContents” and “SQLServer2025_StddevISOContents”. I navigated to the ENTDev directory and pasted in the extracted ISO files. I did the same process for the files of the Standard Developer Edition ISO for 2025, pasting them into “SQLServer2025_StddevISOContents”.
This gave me the extracted contents of both installers. I’ll likely copy these to a central location within my lab for use with other installations and testing I might want to do. Here is that directory, and notice that I have the Install-SQLServer.ps1 script saved in that same folder.
I opened an elevated, Admin PowerShell window and navigated to “C:\SQLServerISOs". I had already adjusted and saved the script with the following changes:
- Kept Default as the value for the $Feature parameter.
- Matched the path parameters to the volume layout of SQL01.
- Changed $Version to 2025.
- Changed $SQLinstance to SQL01.
The script uses PowerShell splatting, which is a way to pass a set of parameters to a command. In our case, it passes the key-value pairs in the $params hashtable for the install values as named parameters to Install-DbaInstance.
When the script ran, I was prompted for an SA password and for service accounts to use for the SQL Server service and SQL Agent service. I had pre-staged separate AD accounts for each of these. I input those account names and the associated passwords. Within a few short minutes, I had install the first SQL Server.
I repeated the process for SQL02.
Creating the Windows Cluster
Always On Availability Groups (AGs) relies on Windows Server Failover clustering. A main difference in this case is that the Windows cluster does not manage the storage in an AG like it does in a SQL Server Failover Cluster.
First, you must install the Windows Failover Cluster feature.
You can use the Server Manager GUI or PowerShell.
From Server Manager:
At the top right click Manage > Add Roles and Features. Next to get to Installation Type where the radio button for “Role-based or feature-based installation” is already selected. Click next. On the next screen ensure the current server is selected and click Next. Click Next on the Server Roles screen to get to the Features menu. On the Features menu select “Failover Clustering”. When you do that, a popup menu will appear and show you what will be installed. Click on the “Add Features” button at the bottom. Back at the Features menu again, click next. The wizard will now be on the confirmation menu. At the top, place a checkmark in the box next to “Restart the destination server automatically if required”. Now click Next.
The above process will need to be done on each replica in the AG you wish to build.
If you prefer to script this process using PowerShell, here is the command.
Install-WindowsFeature -Name Failover-Clustering -IncludeManagementTools
After this is complete, open the Failover Cluster Manager UI. In that UI there is a “Management” section in the middle pane about halfway down. In that section will be a link to “Validate Configuration”. It seems counterintuitive because you haven’t really configured clustering yet, start with this menu to validate that the machine, network config, and other elements are ready to be clustered. When building a cluster that you want Microsoft to support, you will need this report to show you built a valid cluster. The wizard will prompt you to enter the node names of the machines that will be in the cluster and then it will run tests and provide a report.
To create the WSFC using the servers that were just tested, you will want to select the checkbox next to the option for “Create the cluster now using the validated nodes” and click Finish. AS part of the process for creating a Windows cluster, you will need to give the cluster itself a name. That name will need an associated IP address so be sure you have an open IP address for it. Typically, I try to keep the node IPs, the Cluster IP, and later the IP for the AG Listener, all in a consecutive range.
Once the cluster is created, you will want to create a witness of some type. This is part of ensuring quorum, and quorum simply means that there are enough votes between all the participating objects such that the cluster can continue running. Participating objects are the nodes in the cluster, and some type of witness object that servers as a tie-breaker vote. Well designed clusters should have an odd number of votes, and on modern Windows Server OS, dynamic quorum is a functionality that manages the number of votes.
There are 3 types of witnesses:
- File Share
- Disk
- Cloud
For my lab, I created a share on the machine called Utility and gave the Cluster Name Object, i.e. your Windows cluster name, full control over that share and NTFS permissions. Once that is done,within the Failover Cluster Manager go to More Actions > Configure Cluster Quorum Settings. That will open a wizard to step you through the process of adding the designated file share as an object within the cluster.
Click Next on the “Before you begin” page. Now left click the option “Select the quorum witness” and click Next. On the next screen select “Configure a file share witness”. Now enter the path to the directory that has been shared and click Next and then Next again. The witness should now be configured and will show up in the top of the Failover Cluster Manager.
Further resources for this process, including screenshots can be found below.
Build a Windows failover cluster
Windows Server 2025 Failover Cluster
Conclusion
This brings us to the end of the process of installing SQL Server and creating a Windows cluster. The next installment in the series will cover setting up the AG.